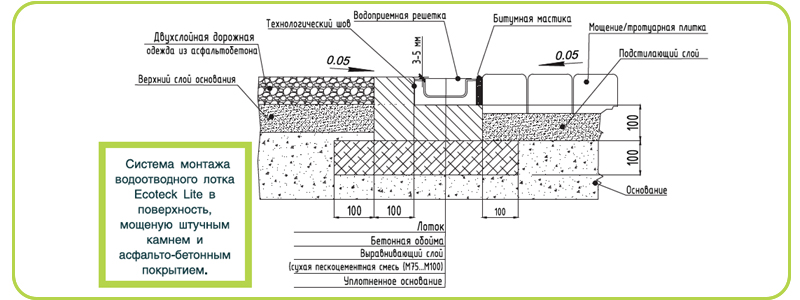
The Light drainage tray is installed on a concrete base with a minimum thickness of 100 mm. The side projection should be at least 100 mm.
Instructions for using the side mount:
- When fixing coatings (gratings), tightening torques M12 = 60Nm, M16 = 100 Nm are used.
Installation of the drainage tray:
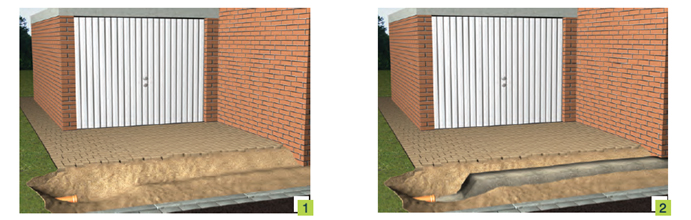
 Dig a trench and bring the Dn 100 pipe to connect the trays to the storm sewer.
 To lay the trays, prepare a base of class B15 concrete with a height of 15 cm and a width of 30 cm.
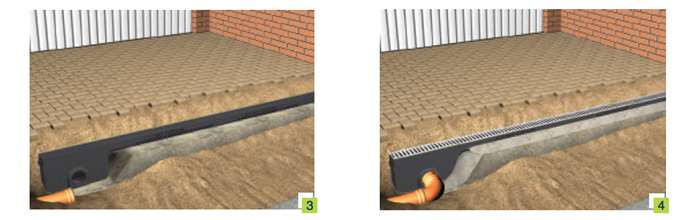
 Installation begins with the installation of a sand trap. The trays are installed in line according to the tongue-and-groove principle.
 When installed in the places where the car passes, the first rows of paving stones should be laid on the same concrete base as the tray itself.
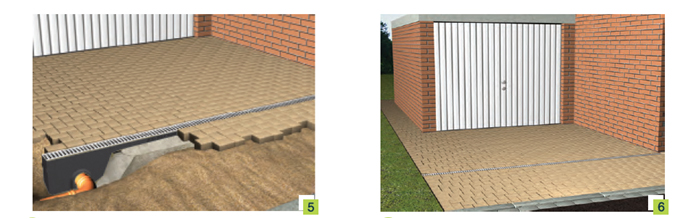
 Fill the anchor pockets of the tray walls with concrete mortar and, depending on the height of the paving, lay them on a common concrete base so that the top of the grate is 3-4 mm below the paving level. Lay the paving stones joint to joint to the wall of the tray.
 Before loading the tray, it is necessary to allow the concrete to solidify.
When preparing the hole for connecting the pipe to the drainage tray, the following operations must be performed:
Determine the place of installation of the plug.
Using a drill with a drill of the appropriate diameter, make a hole for the jigsaw file.
Using a jigsaw to make a hole by sawing it in a circle.
If it is impossible to carry out a closed cut, it is necessary to make cuts along the contour in accessible places, and then knock out the plug with a hammer.
After removing the plug, a sewer pipe is attached to the tray.
Drainage elbows can be easily cut to the required length.
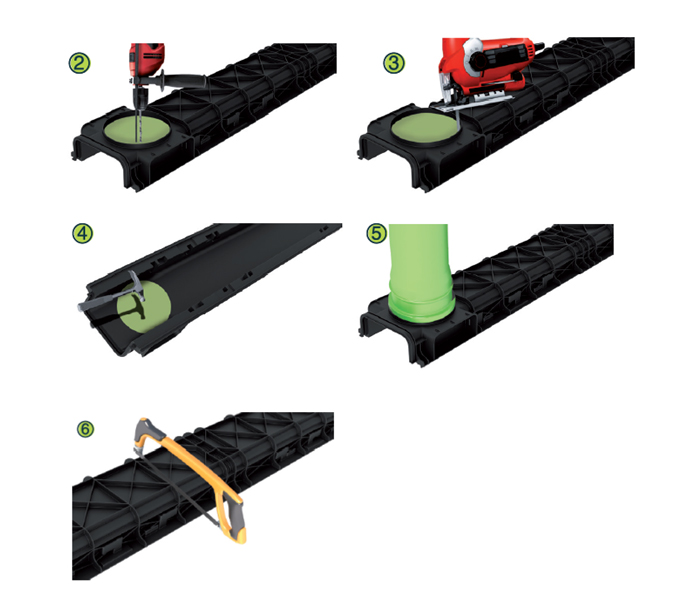
All this can be done using such simple tools as a hacksaw for wood or metal, jigsaw saws and other stationary tools.